 how-to
How to Vet Home Improvement Contractors: 7-Step Guide
Table of Contents
- Why Vetting Home Improvement Contractors Matters
- Step 1: Gather Recommendations From Your Local Community
- Step 2: How to Check a Contractor's License and Qualifications
- Step 3: Verify Insurance Coverage and Reputation
- Step 4: Questions to Ask a Contractor Before Hiring
- Step 5: Contractor Estimate Comparison and Bid Normalization
- Step 6: Your Home Improvement Contract Checklist
- Step 7: Check References and Past Work Before You Sign
- Frequently Asked Questions
Last Updated: October 8, 2026
Why Vetting Home Improvement Contractors Matters
Learning how to vet home improvement contractors is the single best vet home improvement step to protect your home and your wallet. At Handy Gonzo's Home Improvements, we've watched 35 years of DFW projects succeed or fail on this one step.
Here's the hard truth: a bad hire costs far more than a good one. You lose your deposit. You lose months of time.
The FTC's consumer advice on home improvement scams warns that home improvement fraud spikes after storms and during busy seasons.
So this guide walks you through a 7-step vetting process. Each step takes minutes. Together they save you from the nightmare stories you've heard from neighbors.
Step 1: Gather Recommendations From Your Local Community
Start with people who have nothing to sell you. Neighbors, coworkers, and local Facebook groups are gold mines for honest feedback on home improvement work.
A common approach is to ask three simple questions:
- Who did you hire, and would you hire them again?
- Did the project finish on schedule?
- Were there surprise costs?
Where to Find Reliable Referrals
Your local community beats any national directory. Ask at your church, your kids' school, or your HOA meetings. People in your service area know which crews show up and which ones ghost.
Also check neighborhood apps and local contractor directories. Just remember: a recommendation is a starting point, not a green light. You still verify everything below.
Step 2: How to Check a Contractor's License and Qualifications
How to check a contractor's license depends on your state and city, but the process is simple. Look up the license number, confirm it's active, and match the name to the business.
Never trust a license number printed on a business card. Anyone can print anything. Verify it yourself through the official database.
State and Local License Verification
Most states run a public licensing board you can search online. Your city or county may require a separate registration for general contractors and specialty trades.
That patchwork is why you verify at both levels. Search the state board first, then search your city or county building department or consumer affairs office. If the two disagree, treat the stricter requirement as the one that applies to your project.
Check these details:
- License status (active, expired, or revoked)
- License classification or trade specialty, a general building license may not cover roofing, electrical, plumbing, or HVAC, and vice versa
- Business name matches the contract, not just the name on the truck
What to Do When the Rules Differ by Project or Jurisdiction
Licensing rules often change based on the type of work, not just the location. A handyman license may cover small repairs but not a structural remodel. A roofing license may not cover the gutters and fascia on the same job. A specialty license may cover the trade but not the general contracting scope.
Before you sign, ask the contractor three questions:
- Which license or registration covers this specific scope of work?
- Who pulls the permit, you or the contractor, and whose name goes on it?
- If the work crosses into another trade, who holds that license?
If the contractor can't answer clearly, that's your answer.
Why Unlicensed Work Costs You
Hiring an unlicensed contractor can void your homeowner's insurance coverage for the work, expose you to liability if a worker is injured on your property, and create problems when you try to sell the home.
Some states give homeowners a short window to cancel a contract with an unlicensed contractor, and some allow you to recover payments.
For licensing rules in your area, start with your state consumer protection office. They list the boards that regulate contractor licensing requirements.
Step 3: Verify Insurance Coverage and Reputation
Insurance is non-negotiable. A contractor without it leaves you paying for injuries and damage on your property.
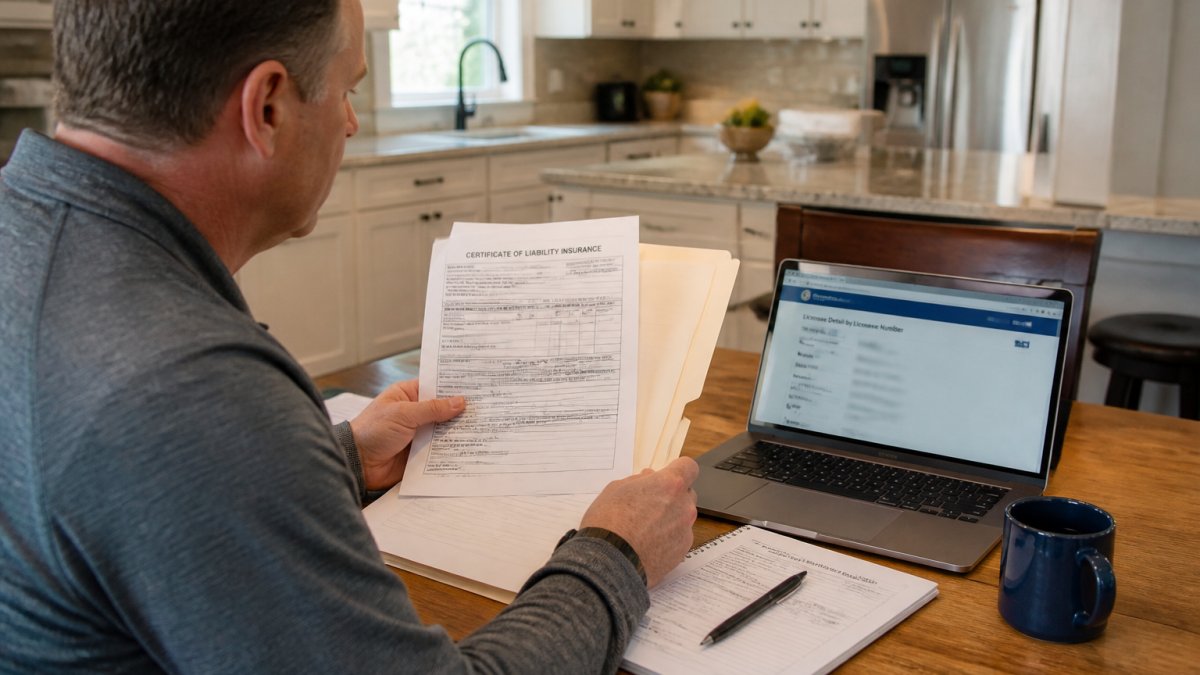
Ask for two documents: general liability insurance and workers' compensation. Then call the insurer to confirm the policy is current. Don't just eyeball a certificate.
Checking Reviews and Customer Feedback
Ratings tell a story, but read the details. One bad review happens to everyone. A pattern of complaints about the same issue is a red flag.
Look for feedback about:
- Workmanship quality
- Communication during the project
- How disputes got resolved
Step 4: Questions to Ask a Contractor Before Hiring
Good questions to ask a contractor before hiring separate the pros from the pretenders. The answers matter more than the pitch.
Ask directly:
- Who is my main point of contact, and how often will I hear from you?
- Will the same crew start and finish my job?
- What's included in the quote, and what costs extra?
- How do you handle schedule delays?
- Can I see recent references from the last year?
Listen for clear, specific answers. Vague responses now become vague work later. A reliable contractor welcomes these questions.
Step 5: Contractor Estimate Comparison and Bid Normalization
A contractor estimate comparison only works when you compare apples to apples. Bids often look different because they cover different things. That's called bid normalization.
Put every bid in the same format. List materials, labor, timeline, and payment terms side by side.
| Bid Item | What to Compare | Red Flag |
|---|---|---|
| Materials | Brand, grade, quantity listed | "Allowance" only, no brands |
| Labor | Crew size, hours, trades covered | Lump sum, no breakdown |
| Timeline | Start date, milestones, finish | No dates at all |
| Payment | Deposit, draws, final payment | Large upfront deposit |
| Permits | Who pulls and pays | "You handle it" |
| Exclusions | What is explicitly not included | Vague or missing exclusions |
| Change orders | Written rate and approval process | Verbal only |
| Warranty | Labor and material terms, length | None stated |
How to Normalize Bids Step by Step
Normalization is a mechanical process. Do it the same way for every bid so the differences are real, not cosmetic.
- Build one spreadsheet with one column per contractor and one row per line item.
- Break each bid into the same categories: demolition, materials, labor, permits, disposal, cleanup, and finish work.
- Convert every allowance into a real number. An allowance is a placeholder, not a price. Ask what brand, model, and grade the allowance assumes, then price that item yourself.
- List every exclusion in its own row. Missing exclusions are the most common source of surprise costs.
- Add a contingency line, most practitioners set aside 10 to 20 percent for changes and unknowns.
- Compare the adjusted totals, not the headline numbers.
When you finish, the lowest headline bid often stops being the lowest adjusted bid. That's the point.
Allowances, Exclusions, and Other Hidden Costs
An allowance is a budget placeholder for a material the homeowner will choose later, such as tile, fixtures, or countertops. If the allowance is set below the real cost of the material you want, you pay the difference.
Exclusions are items the contractor will not do. Common exclusions include permit fees, dumpster rental, drywall repair after electrical work, painting, and moving furniture.
Other costs to look for:
- Permit fees and inspection costs
- Dumpster and debris removal
- Temporary protection for floors and furniture
Warning Signs in Low or Vague Bids
The lowest bid is rarely the best one. It usually means the contractor cut something you can't see yet.
Watch for these warning signs:
- A bid far below every other quote
- No written scope of work
- Pressure to pay a big deposit in cash
Any one of these should stop you cold. There are always other contractors.
Payment Terms That Protect You
Payment structure is where most disputes start. Tie every payment to a completed milestone, not to a calendar date.
A common and defensible structure looks like this:
- A deposit at signing, kept as low as your state allows and never paid in cash
- A draw when demolition and rough-in are complete
- A draw when the work passes inspection
Ask each contractor for a written payment schedule before you sign. If the schedule front-loads most of the money, you lose leverage. If it back-loads everything, some contractors will walk, that's a signal about their cash position, not yours.
Step 6: Your Home Improvement Contract Checklist
A home improvement contract checklist protects you after the handshake. Get everything in writing before work begins.
Use this checklist:
- Full legal names and addresses of both parties
- Detailed project scope and materials list
- Start date and completion date
- Total cost and payment schedule tied to milestones
The Consumer Financial Protection Bureau advises keeping a paper trail of every payment and change. It's your best evidence if a dispute happens.
Step 7: Check References and Past Work Before You Sign
References confirm everything you've checked so far. Call at least three past customers. Ask about their project scope, cost, and customer satisfaction.
Then go see the work. Ask to view a recent project in person. Look at the tile flooring, drywall, painting, and cabinet installation up close.
At Handy Gonzo's Home Improvements, we offer digital quoting with a clear breakdown of materials, labor, and timeline. You get clear expectations before work begins, a dedicated multi-trade crew, and a job site kept clean daily. Our family-owned team has served the DFW Metroplex for over three and a half decades.
Frequently Asked Questions
How do I check if a home improvement contractor is legitimate?
Start by asking for their state or local license number, then verify it directly through your state licensing board's online lookup. Confirm they carry general liability insurance and workers' compensation by requesting a certificate of insurance and calling the insurer to check it is current. Search their business name for complaints with your state attorney general and consumer protection office. A legitimate contractor will provide all of this without hesitation.
What should I ask a contractor before hiring them?
Ask how long they have been in business, whether they carry licensing and insurance, who will be on the crew each day, and how they handle schedule changes. Request three recent references from projects similar to yours, including at least one from the past year. Ask what is included in the estimate, how change orders are priced, and what the payment schedule looks like. Their answers reveal how organized and transparent they are.
How many contractor estimates should I get?
Get at least three written estimates for any project beyond a minor repair. Three bids give you a clear sense of the going rate for your project scope and materials, and they expose outliers. Compare each bid line by line, not just the bottom number, since one contractor may exclude permits or disposal fees. Be wary of any bid that is dramatically lower than the others, as it often signals missing scope or cut-rate materials.
Should I pay a contractor upfront?
A deposit is normal, but keep it modest and tied to materials or a scheduled start date. Never pay the full project cost before work begins, and never pay in cash without a receipt. Set up a payment schedule in your written contract that releases funds as milestones are completed. Many states cap how much a contractor can collect upfront, so check your local consumer protection rules before signing anything.
Vetting a contractor takes a few hours, but it saves you from months of stress. Handy Gonzo's Home Improvements makes it easy with transparent digital quoting, a consistent crew from start to finish, and flexible payment options. Get a free estimate and start your project with clear expectations before work begins.