 how-to
Keep Your Home Livable During Kitchen Remodel
Table of Contents
- Set Up a Temporary Kitchen
- Manage Construction Dust in Your Home
- Plan Your Kitchen Remodel Timeline
- Establish a Dishwashing and Cleanup Station
- Protect Pets and Children During Construction
- Create a Post-Remodel Deep Cleaning Plan
- Manage Stress and Maintain Routines
- Frequently Asked Questions
Last Updated: September 2, 2026
Set Up a Temporary Kitchen
A temporary kitchen is your lifeline during a kitchen remodel. Without one, you'll spend weeks eating takeout and watching your renovation budget disappear. You need a space where you can prepare basic meals, store food safely, and clean up without walking through active construction zones.
Choose Your Location
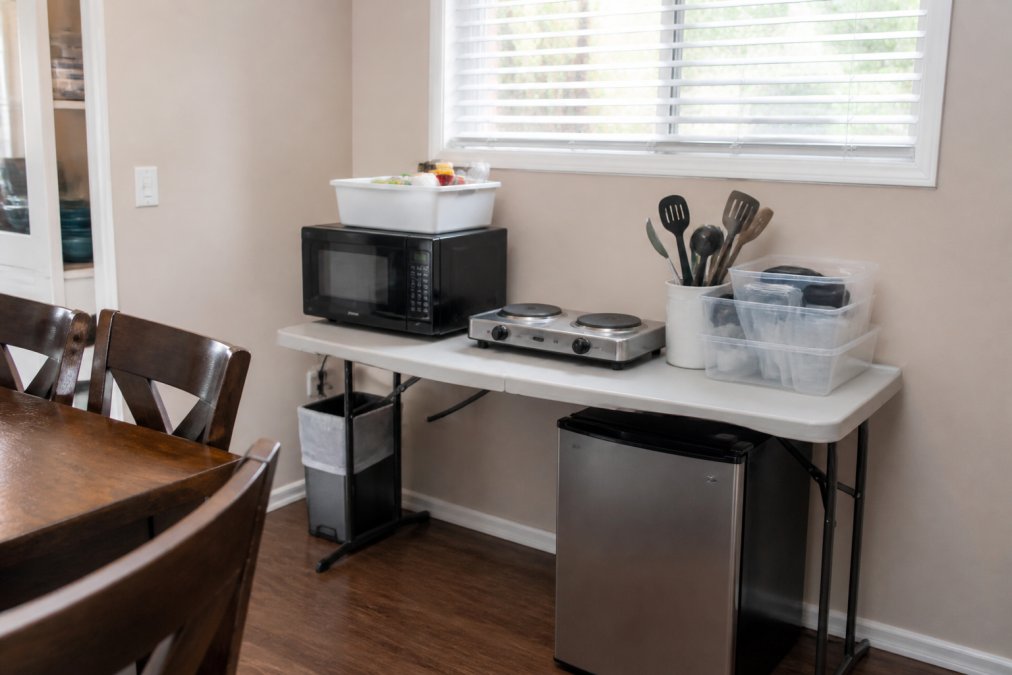
Pick a room as far from your work zone as possible. A dining room, spare bedroom, or basement works better than a kitchen adjacent to the remodel. Distance keeps dust, noise, and foot traffic away from your food preparation area. Ensure your location has access to water and electricity.
Consider traffic flow and proximity to living spaces. Your temporary kitchen should be accessible without requiring contractors to walk through it constantly. A utility sink in a laundry room or basement is ideal; a bathroom sink works if necessary.
Stock Essential Small Appliances
A microwave is non-negotiable for reheating and cooking. A hot plate or portable induction cooktop lets you boil water and cook pasta. A slow cooker or air fryer rounds out your arsenal, turning minimal effort into complete meals. A compact refrigerator keeps perishables safe if you're set up far from your main kitchen.
Stock a basic set of dishes, utensils, and cookware: one large pot, one skillet, a cutting board, and mixing bowls. Paper plates and disposable utensils reduce cleanup stress, though they add to your renovation budget.
Manage Construction Dust in Your Home
Construction dust spreads rapidly through air vents, under doorways, and on contractors' clothes. Managing it aggressively protects your living spaces and reduces post-remodel deep cleaning.
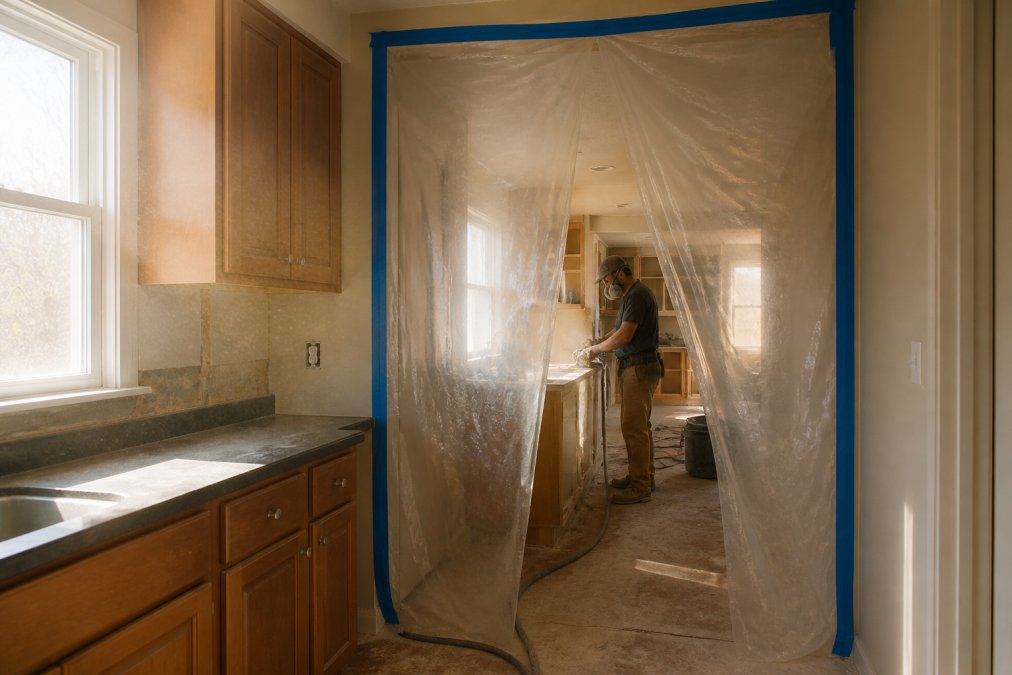
Seal Off the Work Zone
Cover doorways, vents, and openings between your work zone and living spaces with 6-mil plastic and painter's tape. Seal edges thoroughly; gaps let dust escape. Close interior doors and seal gaps underneath with towels or weatherstripping. Cover air returns and ductwork near the work zone with plastic to prevent dust from circulating through your HVAC system. Ask your contractor about negative air pressure systems for heavy demolition.
Control Dust Spread to Living Spaces
HEPA filters and air purifiers capture fine particles. Place one in your bedroom and another in your main living area, running them continuously during work hours. Damp mopping and wiping surfaces with microfiber cloths trap dust better than dry sweeping. Establish a daily cleanup routine: wipe high-traffic surfaces, vacuum with a HEPA-filter vacuum, and mop hard floors. Ask contractors to use dust containment equipment and clean their work zone daily.
Plan Your Kitchen Remodel Timeline
Most kitchen remodels take 6 to 12 weeks, depending on scope (nahb.org). A simple cabinet and countertop update might finish in 6 weeks; a full gut renovation stretches to 10-12 weeks or longer.
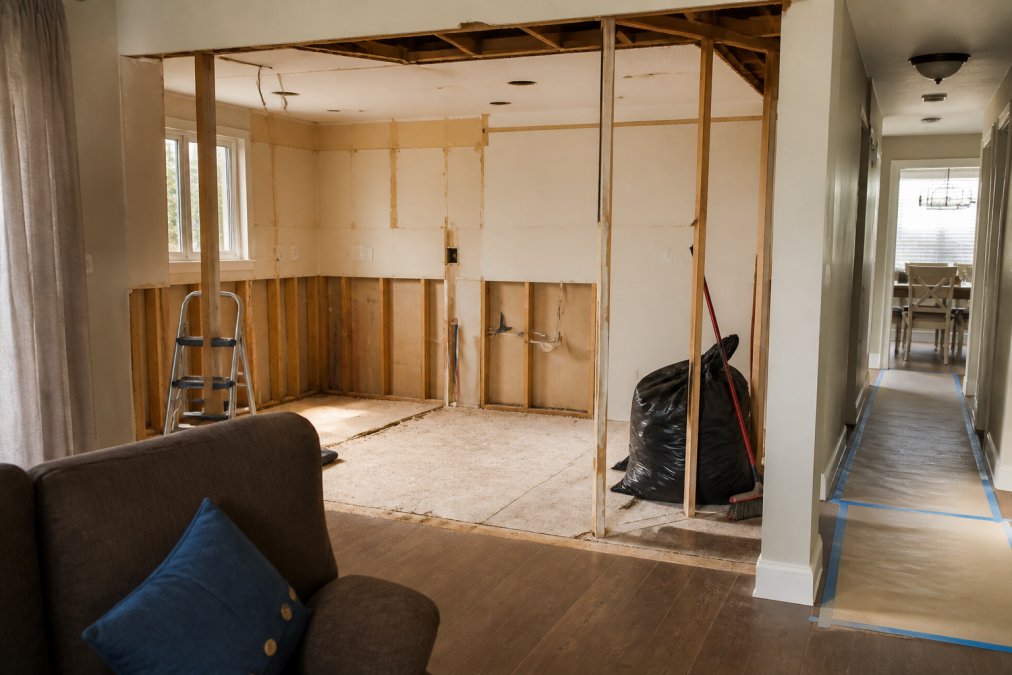
Demolition and prep work happen first, lasting 1-2 weeks and creating the most dust and noise. Rough-in work follows: electrical, plumbing, and HVAC installations take 2-3 weeks. Cabinet installation, countertop fabrication, and finishing touches occupy the final 2-4 weeks. Build a two-week buffer into your expectations for material shortages and unexpected issues.
Ask your contractor for a detailed project timeline broken down by phase. Weekly check-ins keep you informed about progress and upcoming disruptions. Schedule vacations during the rough-in phase when you're least needed at home, or wait until after the project finishes.
Establish a Dishwashing and Cleanup Station
Dishwashing during a kitchen remodel is one of the most underestimated daily burdens. You'll wash dishes by hand for 6 to 12 weeks, potentially hundreds of meals' worth of plates, pots, and utensils.
Choose Your Dishwashing Location
Set up your dishwashing station as far from the work zone as possible, ideally in a utility sink rather than your temporary kitchen. This separation keeps dirty water and food debris away from your food prep area. A utility sink in a laundry room or basement is ideal because it has high sides and better drainage than a standard bathroom sink.
Consider water temperature and accessibility. Hot water is essential for cutting grease and sanitizing dishes. Position your drying rack, soap, and trash bin within arm's reach to minimize steps.
Stock Smart Dishwashing Supplies
Invest in heavy-duty dish soap, microfiber cloths, and a quality sponge or scrub brush. Paper towels for drying beat cloth towels because you won't accumulate a separate load of wet linens. Keep a small trash bin for food scraps and a separate recycling bin for packaging.
Consider a portable or countertop dishwasher if you have access to a water hookup and counter space. These units cost $300-$600 and handle 4-6 place settings per cycle. For a family of four eating three meals a day, this cuts dishwashing time from 45 minutes daily to 15 minutes every other day.
Develop a Realistic Dishwashing Routine
A practical compromise: rinse dishes and stack them in a drying rack immediately after eating, then wash them once daily in the evening or morning. This prevents food from hardening while spreading the labor across the day.
If you're using disposable plates and utensils, budget roughly $15-$25 per week, or $90-$150 over a 6-week remodel. Rotate dishwashing duties among household members if possible. Set a timer for 20 minutes and make it a team task, one person washes, one dries, one puts away.
Plan for Post-Remodel Dishwashing Transition
When your new kitchen is ready, run your new dishwasher empty with a cup of white vinegar to clear construction dust, then run a second empty cycle with hot water only. Your first loads should include glassware and non-food items before you wash dishes you'll eat from.
Protect Pets and Children During Construction
Construction sites are hazardous. Exposed nails, sharp tools, electrical hazards, and heavy equipment create real dangers.
Keep children and pets out of the work zone entirely. Use baby gates or temporary barriers to prevent accidental entry. Explain to kids why they can't go into the kitchen as a safety rule. Contractors need to know about pets and children in your home; they'll adjust their practices accordingly.
Dust and fumes pose health risks, especially for young children and pets with respiratory sensitivities. Run air purifiers in bedrooms and living spaces. If your pet has asthma or allergies, consult your vet about whether they should stay elsewhere during heavy demolition. Keep medications, cleaning supplies, and tools locked away or in sealed containers.
Schedule work during school hours if possible. If someone must be home during construction, keep them in a sealed-off area away from the work zone.
Create a Post-Remodel Deep Cleaning Plan
Your new kitchen will be beautiful and filthy. Construction dust settles everywhere, on top of cabinets, inside drawers, on light fixtures, and deep in your HVAC ducts. A post-remodel deep clean takes 2-3 days and should happen before you move back into your kitchen fully.
Start with your living spaces. Vacuum thoroughly with a HEPA filter, then mop all hard floors. Wipe down baseboards, light switches, and door frames. Dust ceiling fans, vents, and light fixtures. Change HVAC filters, they'll be clogged with construction debris.
Move to your new kitchen last. Wipe down all cabinet interiors and exteriors, countertops, and appliances. Clean inside your refrigerator, oven, and microwave before stocking them. Wash windows and the backsplash. Mop floors thoroughly.
Consider hiring a professional cleaning crew for this phase. They have industrial equipment and the stamina to finish in one or two days. Budget for this cleanup when planning your remodel costs.
Manage Stress and Maintain Routines
Living through a kitchen remodel is psychologically taxing. Your home feels invaded, your family's central gathering space is cordoned off, and constant noise, dust, and disruption wear on everyone's nervous system.
Understand the Specific Stressors of Kitchen Remodels
Kitchen remodels create unique psychological pressure because the kitchen is the emotional center of most homes. It's where families gather, where meals happen, where routines anchor daily life. Losing this space, even temporarily, disrupts more than logistics; it disrupts identity and connection.
Noise is a major stressor. Demolition and power tools create sound levels of 80-100 decibels, comparable to heavy traffic (the CDC). Prolonged exposure elevates cortisol (stress hormone) levels and disrupts sleep (peer-reviewed research). Decision fatigue compounds the stress; you're making dozens of choices about materials, finishes, and layouts while managing daily life.
Create a Noise Management Strategy
Negotiate work hours with your contractor in writing. Standard hours should be 7 AM to 5 PM on weekdays, with no work before 8 AM on Saturdays and no Sunday work. This gives your family predictable quiet time.
Invest in noise-blocking solutions for bedrooms. Earplugs cost $5-$40. Noise-canceling headphones cost $150-$400. White noise machines cost $30-$100, or use a free app. Weatherstripping around doors ($10-$20 per door) and heavy curtains reduce noise transmission significantly.
Schedule quiet activities during loud work phases. If demolition is happening, plan to be out of the house, take kids to school, go to work, visit a library, run errands.
Protect Sleep and Establish Anchor Routines
Sleep is the first casualty of remodel stress. Protect sleep aggressively: establish a consistent bedtime, avoid screens one hour before bed, and keep bedrooms cool and dark. Use earplugs or a white noise machine if construction noise wakes you early.
Maintain one or two non-negotiable daily routines. If your family always eats breakfast together, keep that ritual. If bedtime stories are part of your routine, protect that 15 minutes. These anchors provide psychological stability when everything else feels chaotic.
Exercise is a stress-management tool. A 20-minute walk, yoga video, or bike ride reduces cortisol and improves mood. Schedule it during the noisiest work hours if possible, you'll be away from the noise and burning off stress simultaneously.
Manage Financial Anxiety and Decision Fatigue
Budget a 15-20% contingency fund and communicate this to your family. When unexpected costs arise, frame them as "we budgeted for this" rather than "we're overspending."
Limit decision-making to specific times. Set aside one evening per week for remodel decisions. Batch your choices: "Tuesday night, we choose cabinet hardware, countertop color, and backsplash tile." This prevents decision fatigue from bleeding into your entire week.
Create a simple project tracker (a shared Google Sheet or printed checklist) that shows what's been completed and what's coming next. Update it weekly with your contractor.
Build in Micro-Breaks and Small Wins
Remodels are marathons, not sprints. Build in small celebrations and breaks. When cabinets are installed, take a family photo. When the dust containment comes down, have a special meal in your temporary kitchen to mark the milestone.
Schedule one "remodel-free" evening per week where you don't discuss the project, don't check progress, and don't make decisions. This mental break prevents the remodel from consuming your entire life.
Communicate Expectations with Your Family
Talk to your children about the timeline, the noise, and why it's happening. Use concrete language: "The kitchen will be loud and dusty for six weeks. Then we'll have a beautiful new kitchen where we can cook together." Give them a visual countdown, a calendar where they cross off each week, so they can see progress.
Set clear boundaries about the work zone. Let kids help with non-dangerous tasks like organizing the temporary kitchen or choosing paint colors for other rooms. This gives them agency and involvement.
Check in with your partner and kids regularly. Ask how they're feeling, what's hardest about the remodel, and what they're looking forward to. These conversations prevent resentment from building silently.
Frequently Asked Questions
How do you set up a temporary kitchen during a remodel?
Choose a space away from the work zone, like a dining room or bedroom. Install a utility sink if possible, or use a large basin. Stock small appliances: microwave, hot plate, slow cooker, and air fryer handle most meals. Keep a small refrigerator nearby for perishables. Organize dishes, utensils, and pantry items in accessible containers. Use a folding table as your countertop. This temporary kitchen setup ideas approach keeps meal prep functional without disrupting your living space.
What's the best way to manage construction dust in your home?
Seal off the kitchen with heavy plastic sheeting and duct tape before work begins. Install a HEPA filter in your HVAC system or use portable air purifiers in living spaces. Have contractors use dust containment barriers and vacuum daily with HEPA-equipped machines. Close doors to bedrooms and living areas. Lay drop cloths at entry points. Managing construction dust in home this way prevents it from settling on furniture, bedding, and food preparation areas throughout your house.
How long does a typical kitchen remodel take?
A full kitchen remodel typically takes 4 to 8 weeks, depending on scope. Simple updates may finish in 2 to 3 weeks; major gut renovations can extend to 12 weeks. Your kitchen remodel timeline depends on cabinetry delivery, permit approvals, and subcontractor scheduling. Ask your contractor for a detailed project schedule upfront, including milestone dates for rough-ins, inspections, and final installation. Clear timelines help you plan your temporary kitchen needs and manage disruption to your home.
Can you really live in your house during a full kitchen renovation?
Yes, with proper planning. The key is keeping the work zone sealed off and maintaining a functional temporary kitchen in another area. Establish clear rules with contractors about work hours, foot traffic routes, and cleanup expectations. Use plastic sheeting to contain dust and debris. Ensure bathrooms remain accessible and functional. Protect children and pets from hazards. Most families successfully keep their homes livable during kitchen remodels by setting boundaries and maintaining daily routines outside the construction area.