 how-to
Livable Home During Active Construction: A 2026 Guide
Table of Contents
- How to Plan a Livable Home Environment Before Demo Day
- Dust Control Methods for Residential Construction
- EPA Lead-Safe Renovation Requirements You Must Know
- Setting Up a Temporary Kitchen During Renovation
- Safety Protocols for Children, Pets, and Remote Workers
- Contractor Communication and Project Timeline Management
- Post-Renovation Deep Cleaning and Re-Entry Checklist
- Frequently Asked Questions
Last Updated: August 27, 2026
How to Plan a Livable Home Environment Before Demo Day
Maintaining a livable home environment during active construction is the single biggest challenge homeowners face once a renovation project kicks off. Most people underestimate it until demo day arrives and they're suddenly sharing compressed space with a construction crew, power tools, and fine drywall dust on every surface. At Handy Gonzo's Home Improvements, we've spent 35+ years watching families navigate this transition, and the ones who plan before the first hammer swings fare dramatically better than those who improvise.
The core principle is simple: treat your renovation like a relocation. You're engineering a functional household within a compressed footprint, often for weeks or months at a time.
Mapping Your Designated Living Areas
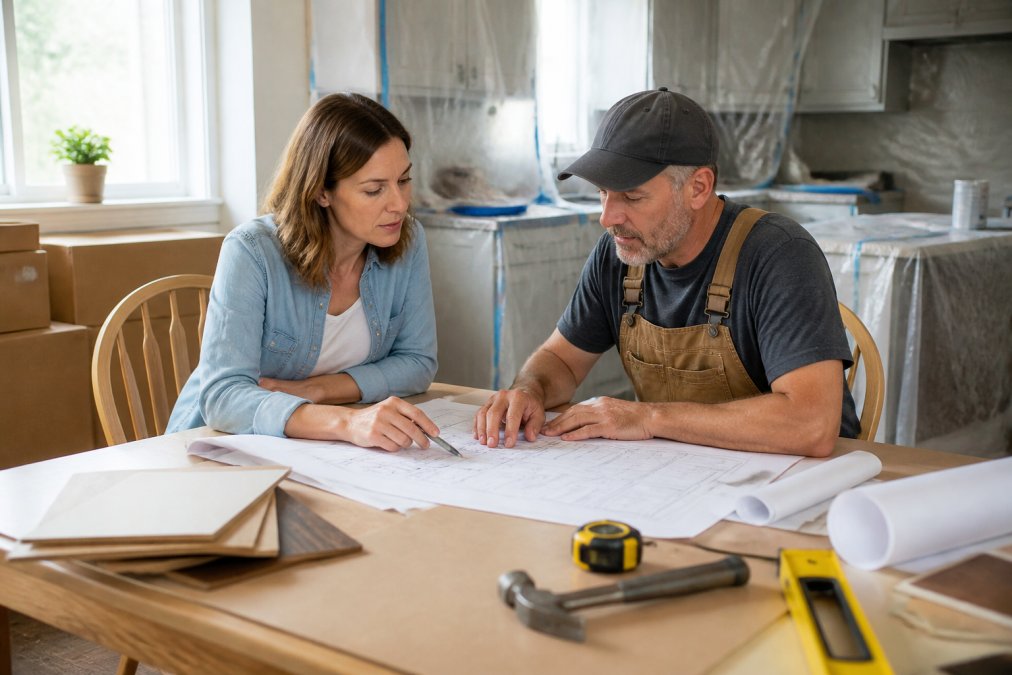
Before any work begins, walk the entire floor plan with your contractor and draw a hard boundary between the construction zone and the occupied zone. Identify which rooms will serve as your temporary living, sleeping, and working spaces, prioritizing rooms farthest from active construction. If the project is a kitchen remodel, your living room becomes your dining room. If it's a whole-floor renovation, consider whether a basement or finished garage can absorb some daily functions.
Mark these zones clearly with tape on the floor or temporary signage. Crews respect visible boundaries more consistently than verbal ones.
Protecting Personal Belongings and Furniture
Construction dust is ultrafine and travels through closed doors, settling into electronics and infiltrating sealed bags. Move everything you value out of the construction zone entirely, not just to an adjacent room.
For furniture that can't be relocated, use heavy-duty plastic sheeting secured with painter's tape at the floor line. Wrap electronics in sealed plastic bags before covering them. Move artwork, rugs, and heirlooms to a storage unit or off-site location for the project duration.
Dust Control Methods for Residential Construction
Effective dust mitigation requires physical barriers, mechanical filtration, and daily site maintenance working together.
Temporary Partitions and Zipper Walls
A zipper wall, a plastic sheeting system with a zipper-seam entry point, creates a dust barrier that workers can open and close without tearing down the seal each time. For larger projects, consider floor-to-ceiling temporary partitions made from rigid foam board or commercial poly sheeting with a sealed perimeter. The seal at the floor and ceiling line is critical, any gap is a pathway for fine particulate matter to migrate into occupied spaces.
HEPA Filtration and HVAC Protection
A HEPA air scrubber placed inside the construction zone creates negative air pressure, pulling dust and fine particles through a filter before they can migrate. According to the EPA guidance on indoor air quality during renovations, fine particulate matter from construction activities poses real respiratory risks to home occupants, particularly children and those with asthma.
Seal all supply and return air vents in the construction zone with plastic sheeting and tape before work begins. Construction dust that enters your ductwork will circulate through the entire home every time the system runs. Change your HVAC filter weekly during active demolition phases.
EPA Lead-Safe Renovation Requirements You Must Know
The EPA Renovation, Repair, and Painting Rule requires that contractors working in homes built before 1978 follow lead-safe work practices if the project disturbs painted surfaces. This is a federal regulatory requirement, not a recommendation.
Lead paint safety under the RRP Rule means your contractor must be EPA-certified, provide you with the "Renovate Right" pamphlet before work begins, use containment and cleanup practices that minimize lead dust, and document their compliance. Asbestos awareness is a parallel concern in homes built before the mid-1980s, particularly in insulation, floor tiles, and textured ceiling coatings.
Ask your contractor directly about their EPA certification status and their protocol for hazardous materials. Lead exposure is a serious health risk, particularly for children, and structural integrity of your household's health depends on getting this right before demo day.
Setting Up a Temporary Kitchen During Renovation
A temporary kitchen setup is the logistical cornerstone of maintaining a livable home environment during active construction. Without one, families default to takeout for every meal, which adds up fast and compounds renovation fatigue over a multi-week project.
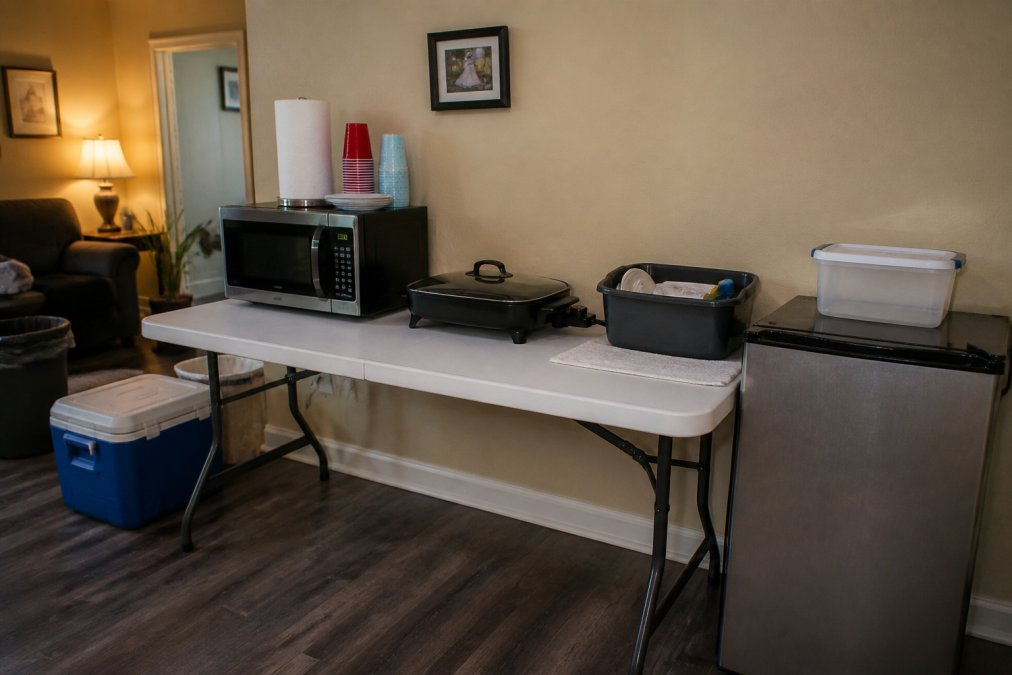
The essentials for a functional temporary kitchen are:
- Microwave or countertop convection oven: handles 80% of daily cooking needs
- Electric skillet or single-burner induction cooktop: covers stovetop cooking without gas or hardwired connections
- Mini-fridge or full-size fridge relocated to a garage or hallway: keeps perishables accessible
- Paper plates and compostable utensils: eliminates dishwashing logistics when you have no sink
- Small dish tub with a drain hose to a nearby bathroom sink: for items that can't be disposable
- A dedicated power strip with surge protection: your appliances are now concentrated in one spot
Locate your temporary kitchen in a room with easy access to a bathroom for water and cleanup. Avoid placing it in a bedroom, as proximity to food smells and appliance heat will affect sleep quality over a long project.
| Appliance | Best Use | Power Draw |
|---|---|---|
| Microwave | Reheating, simple cooking | 900-1200W |
| Induction cooktop | Stovetop meals | 1200-1800W |
| Mini-fridge | Cold storage | 100-200W |
| Electric kettle | Coffee, tea, instant meals | 1200-1500W |
Check your temporary kitchen's circuit capacity before plugging everything in. Running a microwave and an induction cooktop simultaneously on a single 15-amp circuit will trip the breaker.
Safety Protocols for Children, Pets, and Remote Workers
The construction zone is a genuine hazard environment with exposed fasteners, power tools, open subfloors, and chemical compounds. The boundary between living areas and the construction zone must be physically enforced, not just communicated. Baby gates and locked doors are the minimum standard. Brief children on the rules daily, not once. Pets should be relocated to a crate, a separate room with a closed door, or an off-site location during active work hours.
Noise Reduction Strategies That Actually Work
Negotiate specific working hours with your contractor upfront. Most residential crews can commit to an 8 a.m. to 5 p.m. window. Schedule work requiring the loudest tools, demolition, and framing in concentrated blocks rather than spread throughout the day.
Move sleeping areas as far from the construction zone as possible. Use white noise machines in children's rooms and home office spaces. For remote workers, a quality headset with active noise cancellation handles most mid-frequency construction noise effectively.
Psychological Impact on Remote Workers During Long Renovations
Remote workers living through a long renovation face a compounding problem: their workspace and construction site are the same address. Renovation fatigue is real, with sustained low-grade stress accumulating over weeks.
Establish a dedicated work zone physically separated from both the construction zone and the main living area. A bedroom with a door that closes is the minimum. Set fixed work hours and communicate them to your contractor so the loudest work doesn't coincide with your most demanding calls.
Contractor Communication and Project Timeline Management
Clear contractor communication is what separates a manageable renovation from one that consumes your household. Establish a communication protocol before work begins: a daily or every-other-day check-in, a brief text update, an end-of-day walk-through, or a weekly formal progress meeting depending on project scale.
According to the National Association of the Remodeling Industry's consumer guidance, clear written documentation of scope, timeline, and payment milestones is one of the most important protections a homeowner has during a renovation project. Review your renovation contract carefully for change order procedures, which prevent surprise costs from appearing mid-project.
When delays occur, ask for a revised timeline in writing. A contractor who won't provide that is managing their own schedule, not yours.
Post-Renovation Deep Cleaning and Re-Entry Checklist
Post-renovation deep cleaning is the final phase of maintaining a livable home environment during active construction, and it deserves the same planning as everything that came before it.
Use this checklist before declaring re-entry:
- Replace all HVAC filters throughout the home
- Vacuum all ductwork supply and return registers with a brush attachment
- Wipe all hard surfaces, walls, ceilings, and trim with a damp microfiber cloth before vacuuming floors
- Vacuum all upholstered furniture with a HEPA-filter vacuum
- Wash all window treatments, bedding, and soft goods that remained in the home during construction
- Clean inside all cabinets and drawers before restocking
- Wipe down all appliances, including refrigerator coils and microwave interiors
- Mop all hard floors twice, once with a damp mop, once with a cleaning solution
- Inspect all newly installed fixtures and surfaces for debris or protective film that needs removal
- Confirm all contractor debris has been removed from the property and disposal documentation is on file
For projects involving lead paint disturbance, the EPA's lead-safe cleanup guidelines specify additional wet-mopping and HEPA vacuuming requirements before occupants return. Follow these protocols precisely.
Keeping your home functional through a full renovation takes more than good intentions. It takes a structured plan, clear boundaries, and a contractor who treats site cleanliness as part of the job, not an afterthought. Handy Gonzo's Home Improvements maintains clean job sites daily and assigns a dedicated crew from start to finish, so you're not starting over with new faces every week. With 35+ years of experience and transparent digital quoting that breaks down materials, labor, and timeline before work begins, we give you the clear expectations that make a livable home environment during active construction for residential renovation achievable. Get a Free Estimate from Handy Gonzo's Home Improvements and start your project with a plan that works for your whole household.
Frequently Asked Questions
Can I live in my house while it's being renovated?
Yes, most homeowners stay in their homes during renovation, but it takes planning. The key is establishing designated living areas that contractors agree to keep clear and clean each day. For major structural work, gut kitchen renovations, or projects involving hazardous materials like lead paint or asbestos, temporarily relocating, even for a week or two, is often the safer and less stressful option. Talk through the project timeline with your contractor before work begins to identify the most disruptive phases.
How do I keep dust and debris contained during a home remodel?
Dust control methods for residential construction start with temporary partitions, zipper-wall systems or heavy poly sheeting taped tightly over doorways. Ask your contractor to use HEPA-filtered vacuums during demo and to seal HVAC registers in the work zone so construction dust doesn't travel through your ductwork. Negative air pressure machines pull debris-laden air out rather than letting it drift into living spaces. Daily debris removal from the job site also makes a significant difference in overall air quality throughout the project.
What health and safety risks come with living in a house during construction?
The main risks are airborne dust, noise exposure, and hazardous materials. Fine silica dust from cutting concrete or tile is a respiratory hazard under OSHA standards. Homes built before 1978 may contain lead paint, which triggers EPA lead-safe renovation requirements, certified contractors must follow specific containment and cleanup procedures. Asbestos in older flooring or insulation requires licensed abatement. Beyond physical hazards, prolonged renovation fatigue and disrupted daily routines carry a real psychological toll, especially for anyone working from home.
How can I set up a functional temporary kitchen during a major renovation?
Setting up a temporary kitchen during renovation works best in a space with an existing outlet and water source nearby, a dining room, laundry room, or garage all work. The essentials are a countertop microwave, a two-burner electric induction cooktop, a mini-fridge, and a folding table. Add a dish tub and a water jug if your sink is out of service. Stock disposable plates to cut down on washing. Designate one cabinet or shelving unit for pantry items so the setup stays organized throughout the project.