 ultimate-guide
Accessible Walk-In Shower Installation: Cost & Process
Table of Contents
- What Accessible Walk-In Shower Installation Involves
- ADA Compliant Bathroom Remodel Cost Breakdown
- Walk-In Shower Conversion Timeline: What to Expect
- Bathroom Safety Modifications for Seniors and Accessibility
- Key Design Features That Affect Installation Cost
- Getting an Accurate Quote for Your Project
- Frequently Asked Questions
Last Updated: September 3, 2026
What Accessible Walk-In Shower Installation Involves
An accessible walk-in shower installation is a bathroom renovation that creates a barrier-free, safe bathing environment for seniors, people with disabilities, and anyone seeking enhanced accessibility features. Unlike traditional showers with raised curbs or tub-to-shower conversions that only address one barrier, a comprehensive accessible walk-in shower installation addresses multiple safety and mobility challenges through thoughtful design and specialized materials.
The process involves removing existing fixtures, preparing the floor for proper drainage, installing waterproofing systems, laying non-slip flooring, and adding safety features like grab bars and handheld showerheads. At Handy Gonzo's Home Improvements, the work typically requires coordination between plumbing, tile, waterproofing, and finishing trades.
What makes this different from a standard shower installation is the attention to ADA-compliant bathroom remodel standards. The entry must be curbless or have a minimal threshold. Floor slopes must direct water to drains without creating trip hazards. Grab bars need structural backing installed during framing, not surface-mounted afterward. These details aren't optional upgrades, they're foundational to accessibility.
Most homeowners underestimate how much planning goes into the hidden work. You don't see the waterproofing membrane, the sloped substrate, or the blocking behind walls where grab bars will mount. But these components determine whether the shower functions safely for 20 years or develops leaks within five.
ADA Compliant Bathroom Remodel Cost Breakdown
An ADA-compliant bathroom remodel varies significantly based on scope, materials, and existing conditions. Rather than stating a fixed price range (which would be misleading), understand that costs depend on several factors: whether you're converting a tub to a shower or building from scratch, the size of the space, your choice of materials, and your local labor market.
The primary cost categories for an accessible walk-in shower installation are labor, materials, and structural modifications. Labor typically represents 40-50% of the total project cost, depending on complexity. Materials, tile, waterproofing, fixtures, and safety hardware, account for another 30-40%. Structural work like plumbing relocation, framing adjustments, or floor preparation can add 10-20% depending on your existing bathroom layout.
Waterproofing systems are a critical cost driver. Budget-conscious approaches use standard cement board with membrane paint. Premium approaches use pre-sloped shower pans or waterproofing sheets designed specifically for accessible showers. The difference in durability and long-term maintenance is significant. A properly installed Schluter waterproofing system, for example, costs more upfront but virtually eliminates the risk of water damage behind walls.
Tile selection ranges from basic ceramic to high-end porcelain or natural stone. Non-slip flooring adds cost but is essential for safety. Grab bars, handheld showerheads, and accessible fixtures are specialized items that cost more than standard hardware but provide years of safety and independence.
The best way to understand your specific costs is to get a detailed quote that breaks down materials, labor, and timeline. Handy Gonzo's Home Improvements provides transparent digital quoting so you see exactly what's included before work begins, no surprise costs halfway through.
Walk-In Shower Conversion Timeline: What to Expect
The timeline for an accessible walk-in shower installation depends on project scope, but most conversions take 2-4 weeks from start to finish. A simple tub-to-shower conversion in an existing bathroom typically takes 3-4 weeks. A complete bathroom remodel with structural changes can stretch to 6-8 weeks or longer.
The first phase is demolition and prep, which usually takes 3-5 days. This includes removing the existing tub or shower, protecting adjacent areas, and exposing the substrate. Next comes structural work, plumbing relocation, framing adjustments, or floor preparation, which can take 5-10 days depending on complexity.
Waterproofing and substrate installation is critical and cannot be rushed. This phase typically takes 5-7 days. The floor must slope correctly toward the drain, the waterproofing membrane must be installed properly, and everything must cure before tile work begins. Rushing this step is how leaks happen.
Tile installation and finishing work usually takes 7-10 days. This includes laying tile on walls and floors, grouting, sealing, and installing fixtures. The final phase involves caulking, installing grab bars, and final touches, which takes 2-3 days.
Between major phases, there are cure times. Waterproofing membranes need 24-48 hours to set. Grout and thin-set mortar need time to cure. These aren't delays, they're necessary for durability. A contractor who tries to compress these timelines is cutting corners.
Weather, material delays, and unexpected conditions can extend timelines. If your bathroom has plumbing or electrical surprises, the timeline shifts. Handy Gonzo's Home Improvements maintains consistent crews throughout your project, so you're not waiting for different trades to coordinate. We also keep job sites clean daily, so your home remains livable even during active construction.
Bathroom Safety Modifications for Seniors and Accessibility
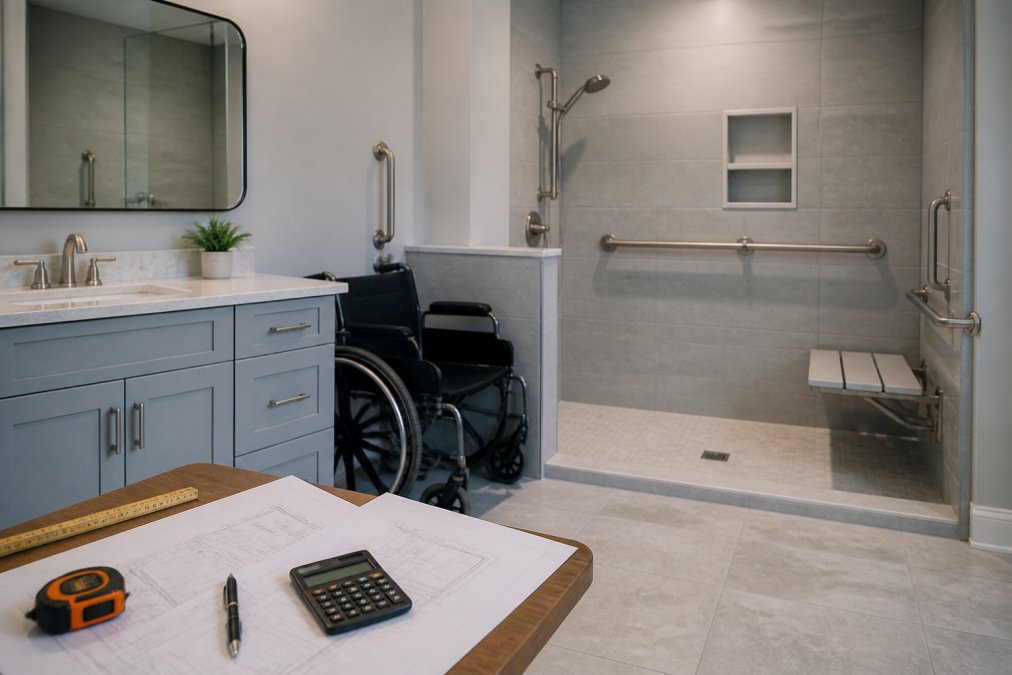
Bathroom safety modifications go beyond aesthetics, they're about independence and preventing falls, which are the leading cause of injury for seniors (the CDC). The most critical modifications for an accessible walk-in shower installation include grab bars, non-slip flooring, curbless or low-threshold entry, and adequate lighting.
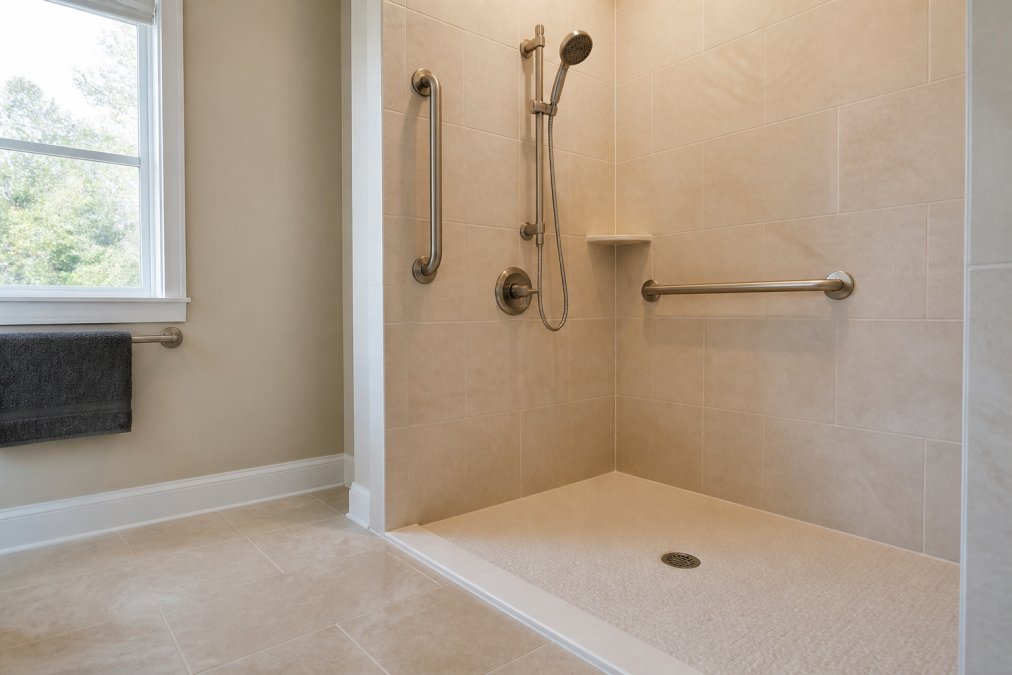
Grab bars must be structurally sound, mounted into wall framing, not just surface-mounted onto tile (ada.gov). A person pulling themselves up exerts significant force. Surface-mounted bars fail. The standard placement includes bars near the shower entrance, along the wall where a person stands, and near the exit. Bars should be 1.25 to 1.5 inches in diameter for comfortable grip.
Non-slip flooring is essential. Standard tile can be dangerously slippery when wet. Textured tile, porcelain with non-slip coatings, or specialized safety flooring reduces fall risk significantly. The slope toward the drain should be subtle, enough to move water but not so steep that it creates a trip hazard.
Curbless or low-threshold entry eliminates the most common trip hazard. A traditional shower curb is typically 4-6 inches high. An accessible entry is level with the bathroom floor or has a threshold under 0.5 inches (ada.gov). This allows wheelchair access and reduces fall risk for anyone with mobility challenges.
Lighting matters more than many homeowners realize. Poor lighting makes it harder to see wet floors or navigate safely. Recessed lighting or wall sconces that illuminate the shower area reduce accidents. Avoid shadows and ensure adequate brightness.
A handheld showerhead is standard in accessible design. It allows someone to control water direction without reaching or standing in awkward positions. Mounting height should accommodate both seated and standing users.
Seating options, a shower bench or fold-down seat, provide safety and independence. Someone can sit while bathing if standing becomes difficult. The bench must be securely mounted and made of materials that won't rot or slip.
Key Design Features That Affect Installation Cost
Several design choices directly impact the cost of your accessible walk-in shower installation. Understanding these trade-offs helps you make informed decisions about where to invest and where to simplify.
Barrier-Free and Curbless Shower Entry
A curbless or barrier-free shower entry is the signature feature of accessible design, but it requires careful planning. The entry must be level with the bathroom floor, no step up or down. This sounds simple, but it requires the shower pan to slope subtly toward a drain without creating a trip hazard or allowing water to escape into the bathroom.
Traditional shower pans have a raised curb and slope inward. A curbless pan must slope in a way that's nearly imperceptible to walk across. This requires precision in substrate preparation and often benefits from a linear drain system rather than a center drain. Linear drains run along one wall, allowing the floor to slope in one direction rather than from all sides.
The cost difference between a standard curbed shower and a curbless design is usually 15-25% higher due to the extra planning, substrate work, and specialized drain systems. However, the accessibility benefit is significant, anyone with a wheelchair, walker, or mobility challenges can enter without assistance.
Some homeowners choose a compromise: a very low threshold (0.5 inches or less) rather than completely curbless. This reduces some cost while maintaining most accessibility benefits. The trade-off is that someone in a wheelchair might still need assistance, but the barrier is minimal.
Materials and Waterproofing Systems
Material choices range from budget-conscious to premium, and they affect both cost and longevity. Standard ceramic tile is affordable but less durable than porcelain. Porcelain is denser, less porous, and lasts longer. Natural stone (marble, granite, slate) is beautiful but requires sealing and more maintenance.
Waterproofing systems are where material choice really matters. A basic approach uses cement board with liquid waterproofing membrane. This works if installed correctly but depends on proper application. Premium systems use pre-formed shower pans (like Schluter systems) that are engineered to prevent leaks. These cost more but virtually eliminate water damage risk.
For a curbless or low-threshold shower, premium waterproofing is worth the investment. Water is more likely to migrate toward the bathroom floor in these designs, so the waterproofing barrier needs to be strong.
Fixture choices also vary. Basic chrome fixtures are affordable. Brushed nickel or stainless steel cost more but resist corrosion better, especially in humid bathrooms. Accessible fixtures like handheld showerheads with longer hoses and grab bars with ergonomic grips cost more than standard hardware but provide better function.
Getting an Accurate Quote for Your Project
An accurate quote for an accessible walk-in shower installation should include detailed line items: demolition, structural work, plumbing, waterproofing, tile, fixtures, labor, and timeline. Vague quotes like "bathroom remodel: $8,000-12,000" tell you nothing about what's included or excluded.
Ask your contractor for a breakdown that shows material costs separately from labor costs. This helps you understand where money is going and where you might adjust choices. A quote should also specify timelines for each phase and clarify what happens if unexpected conditions are discovered.
Red flags in quotes include: no timeline provided, vague descriptions of materials, labor costs bundled together without detail, and no mention of waterproofing specifications. A contractor who can't explain their waterproofing approach hasn't thought through accessibility carefully.
Before comparing quotes, make sure you're comparing the same scope of work. One quote might include plumbing relocation and structural framing; another might not. One might specify premium waterproofing; another might use basic membrane. These differences explain cost variations far more than contractor pricing.
Request recent references from accessible bathroom projects completed in the last year or two. Ask to see photos of work they've done. A contractor with 35+ years of experience like Handy Gonzo's Home Improvements should be able to show you recent projects that demonstrate the quality and attention to detail accessible bathrooms require.
Ask about insurance and tax credits. Some accessibility modifications qualify for tax deductions or credits. Your contractor should be familiar with these programs and help you understand whether your project qualifies. Insurance sometimes covers accessibility modifications if they're medically necessary, but coverage varies widely.
Accessible bathroom remodeling is an investment in safety, independence, and home value. The process requires careful planning, skilled trades, and attention to detail, especially in waterproofing and safety features. When you choose a contractor, prioritize experience with accessibility projects and transparent communication about costs and timelines.
At Handy Gonzo's Home Improvements, our approach combines 35+ years of construction knowledge with digital quoting that shows you exactly what's included before work begins. We maintain dedicated crews throughout your project so you get consistent quality, not a parade of different trades. Get a free estimate today and see how we can transform your bathroom into a safe, accessible space that supports independence for years to come.
Frequently Asked Questions
How much does it cost to install a wheelchair accessible shower?
The cost of an accessible walk-in shower installation depends on your home's current layout, whether you're converting from a tub, the materials you choose, and the complexity of plumbing and waterproofing work required. Factors like custom tile work, grab bar placement, non-slip flooring, and drainage systems all influence the final price. For an accurate estimate specific to your project, contact a local contractor who can assess your bathroom and provide a detailed quote.
How long does a professional walk-in shower conversion timeline typically take?
A walk-in shower conversion usually takes 2 to 4 weeks from start to finish, depending on the scope of work. Simple conversions with minimal plumbing changes may take 10-14 days, while projects requiring structural modifications, extensive waterproofing systems, or custom tile work can extend to 4-6 weeks. Your contractor should provide a realistic timeline during the planning phase so you know when to expect completion.
What safety features should be included in an accessible bathroom design?
Essential safety features for accessible bathrooms include grab bars installed at 33-36 inches from the floor, non-slip flooring throughout the shower and bathroom, a curbless or low-barrier shower entry, a shower bench or seat, a handheld showerhead, and adequate lighting. ADA-compliant design also specifies clear floor space for wheelchair maneuvering and controls positioned within reach. These modifications reduce fall risk and improve independence for seniors and people with disabilities.
Will Medicare or insurance help pay for an accessible shower installation?
Medicare may cover some accessibility modifications if they're deemed medically necessary and prescribed by a doctor. Coverage varies by plan and circumstance. Some states offer tax credits or grants for home modifications that improve accessibility and aging in place. Contact your insurance provider or local aging services agency to explore financial assistance options before beginning your project.